Getting an app onto the App Store is not one action. It is an Apple developer account in your own name, an app identity you cannot casually change later, a signed binary, a store listing, a privacy declaration, and a human review that can send you back. Most first submissions fail on one of those, not on the code.
This guide walks the path in the order you actually hit it, names the specific Apple guidelines behind the common rejections, and marks every requirement that is scheduled to change so you check it rather than trust this page. It does not promise an approval, and it does not promise a review time.
QUICK ANSWER
How do you publish an app to the App Store?
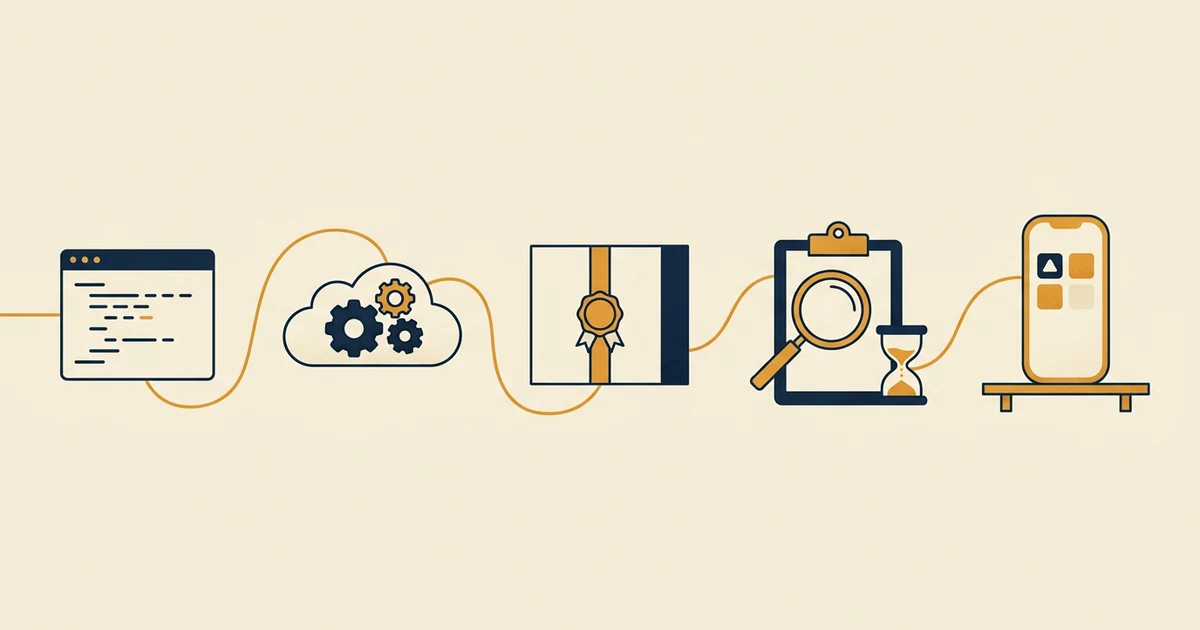
Publishing an app to the App Store has five parts: enrol in the Apple Developer Program under your own name, give the app a bundle identifier and a real reason to exist on the device, build a signed binary, upload it to App Store Connect, then complete the listing and submit it for App Review yourself. Apple reviews every version and can reject it.
Five things that must be true before you open App Store Connect
Each of these blocks the submission rather than slowing it down, and each one is cheaper to fix before a binary exists than after a reviewer has read your listing.
- An Apple Developer Program membership in your own name: The app ships under the account of whoever owns its content. Apple guideline 4.2.6 states that apps created from a commercialized template or app generation service will be rejected unless they are submitted directly by the provider of the app content, and that those services should not submit apps on behalf of their clients. Read the current wording in the App Store Review Guidelines before you assume any tool can submit for you. Checked 2026-08-16.
- A bundle identifier you have decided on and will keep: The bundle identifier is reverse-DNS, for example com.yourcompany.yourapp. It is the permanent identity of the app inside Apple systems. Choosing it in a hurry, then wanting a different one after the first upload, means a new App Store Connect record and a fresh start, not a rename.
- A privacy policy that is published and true: Guideline 5.1.1(i) requires a privacy policy link in the App Store Connect metadata field and inside the app itself, and requires that the policy identify what data the app collects, how it collects it, every use of that data, what third parties receive it, and how a user revokes consent or requests deletion. A placeholder page fails this. Checked 2026-08-16.
- Working sign-in credentials for the reviewer, or a demo mode: Guideline 2.1(a) says submissions should be final versions with fully functional URLs, and asks you to include demo account information and to turn on your backend service if the app has a login. A reviewer who cannot get past your sign-in screen rejects the build. If legal or security duties stop you providing an account, Apple allows a built-in demo mode with prior approval. Checked 2026-08-16.
- Something the app genuinely does on the device: Guideline 4.2 says the app should include features, content and UI that elevate it beyond a repackaged website, and 4.2.2 says apps should not primarily be marketing materials, advertisements, web clippings, content aggregators or a collection of links. If your plan is to wrap the site you already have, decide now what the phone version does that the browser tab does not.
Credentials and access
| Credential | Minimum access | Storage and rotation |
|---|---|---|
| App Store Connect API key A .p8 private key plus its key ID and issuer ID, created under Users and Access in App Store Connect | The smallest App Store Connect role that can upload builds for your app. Do not issue an Admin key for an upload robot. | The build environment as a secret value. In a Playcode project the agent writes it with SetEnv marked secret, so it lands in the process environment and never in chat, code, or a committed file. Treat the private key file as unrecoverable once you leave the creation screen: save it into the secret store immediately. If it leaks, or a contractor leaves, revoke the key in App Store Connect and issue a new one. |
| Expo access token A personal access token for the Expo account that owns the build project, read by eas-cli as EXPO_TOKEN | The Expo account or organization that owns this one project, so a leaked token cannot reach unrelated apps. | The build environment as a secret value, one token per machine or automation runner so you can revoke a single one. Revoke and reissue in Expo account settings when a runner is decommissioned or a token appears anywhere it should not, such as a log or a screenshot. |
Pick how the signed binary gets made, then stop thinking about it
An iOS build has historically meant a Mac, Xcode, and certificates you manage by hand. That is no longer the only path. Expo documents that EAS Submit works on macOS, Linux and Windows, and that a build uploaded this way appears in TestFlight after processing, usually 10 to 15 minutes, without being released to the App Store. Checked 2026-08-16. The choice below is about who owns the toolchain and the signing keys, not about whether the app can be built at all.
| Approach | Best for | Tradeoff |
|---|---|---|
| Your own Mac with Xcode and hand-managed signing | A team that already has Apple hardware, needs native modules outside what a hosted build service supports, or wants every certificate in its own keychain. | You buy and maintain the machine, and distribution certificates and provisioning profiles expire on Apple schedules rather than yours. A lost keychain becomes a real incident. |
| A hosted cloud build plus a store upload command, under your own store accounts | Almost every first app, and anyone on Windows or Linux. The service compiles the binary and manages the signing certificates; the developer account, the listing, and the submit button stay yours. | You depend on the build service being available on the day you want to ship, and you accept its supported set of native modules. Builds queue behind other people during busy periods. |
| A cloud build, then a manual upload from a Mac | A team that wants the cloud to compile but has a policy reason to keep the upload step on a controlled machine. | You still need a Mac for the upload tooling, so the main benefit of the cloud path is lost. Useful as a fallback when a submit command is unavailable, not as the default. |
| An app maker that publishes under its own developer account | Nothing that you want to own. It is listed here because it is the path most beginners are sold first. | It runs straight into guideline 4.2.6, and even when a submission survives, the listing, the reviews, the users and the ability to move the app all belong to the vendor rather than to you. |
Recommended:Take the second option. Let a cloud service compile and sign, keep your own Apple Developer Program membership, and keep the final submit in your hands. That combination is also what Apple guideline 4.2.6 requires: the content owner submits.
Publish an app to the Apple App Store
Enrol, fix the app identity, build a signed binary, test it on real devices, complete the App Store Connect listing, and submit it for App Review yourself.
STEP 01
Enrol in the Apple Developer Program before you write a word of the listing
Enrolment is identity paperwork, not a checkout. Start it early because approval is not instant.
Individual enrolment needs an Apple Account with two-factor authentication, your legal name in the first and last name fields, a real address (Apple's enrolment page states that P.O. boxes are not accepted), and identity verification from a government photo ID. Your personal legal name becomes the seller name shown on the App Store. An alias or a company name in those fields delays approval. Checked 2026-08-16.
Organization enrolment additionally needs a legal entity that can enter contracts with Apple, a D-U-N-S Number, a work email on the organization domain, a public website, and a person with the legal authority to bind the company. Apple states it does not accept trading names or branches. If you want the company name on the listing rather than your own, budget time for this.
Apple lists the Apple Developer Program at 99 USD per membership year on that same enrolment page, with prices varying by region and a fee waiver available to qualifying nonprofits, accredited educational institutions and government entities. That figure was read on 2026-08-16. Confirm it on the enrolment page before you budget, because a price on a blog post is exactly the kind of fact that goes stale.
This membership is separate from any tool you build the app with. Nobody can sell you an App Store listing without it.
Expected result: Enrolment is approved, you can sign in to App Store Connect, and the seller name that will appear on the listing is the name you intended.
Verify it: Sign in to App Store Connect with the same Apple Account. Confirm that the membership shows as active and that the account holder is you or your company, not a vendor or an agency.
STEP 02
Decide what the app does on the phone that the website does not
This is a product decision with a review consequence, so make it before you build anything.
Write one sentence describing the job someone opens the app to do, and one sentence describing why they open it again next week. If both sentences are true of your website in a browser tab, guideline 4.2 is going to be a problem.
Pick the device capabilities that make the phone version worth installing: notifications for something time-sensitive, a camera step, offline access to data they already own, a location-aware view, or a saved session so they are not signing in every visit. One real capability is enough. Four half-built ones are not.
Note the ones you are not doing. A capability you declare in the listing and do not ship reads as inaccurate metadata under guideline 2.3, which is a separate rejection from 4.2.
Expected result: You can name, in one sentence, the thing the app does on the device, and you have not promised anything in that sentence you do not intend to build.
Verify it: Show the sentence to someone who has used your website. If their reaction is that they would just use the site, rewrite the app scope before you build.
STEP 03
Fix the bundle identifier, display name, and version in the app config
These four values follow the app for its whole life. Set them once, deliberately.
The bundle identifier is reverse-DNS and must be unique across the App Store, so use a domain you control. Registering it against the wrong Apple team, or against a personal account when the app should belong to a company, is the expensive version of this mistake.
The version string is what users see. The build number is what App Store Connect uses to tell two uploads apart, and it must increase on every upload of the same version. A rejected upload still consumes its build number.
The display name is what appears under the icon on the home screen and is limited by width, not only by character count. Test it on a real device rather than trusting the config file.
{
  "expo": {
    "name": "Riverbank Bakery",
    "slug": "riverbank-bakery",
    "version": "1.0.0",
    "ios": {
      "bundleIdentifier": "com.riverbankbakery.orders",
      "buildNumber": "1",
      "supportsTablet": false
    }
  }
}
Expected result: A build produced from this config carries the identifier, version and build number you intended, and the home-screen name is not truncated on a small phone.
Verify it: Create the app record in App Store Connect using the same bundle identifier. If the console reports the identifier is already in use, resolve that before building, not after.
STEP 04
Put the Apple credentials in the build environment as secrets
The upload step authenticates to Apple. Those values belong in the environment, never in chat or a committed file.
Create an App Store Connect API key rather than using an Apple ID and password for automation. A key can be scoped and revoked without touching the human account, and it does not break when someone changes a password or a two-factor device.
Save the private key file into the same secret store as the rest of your production credentials on the day you create it, and treat it as unrecoverable afterwards. If it goes missing, the fix is to revoke that key and issue a new one, not to hunt for a second copy.
In a Playcode project the agent writes these values with SetEnv marked secret, so they reach the process environment that the store tooling reads and are never echoed back into the conversation. If you are working outside Playcode, the equivalent rule is: environment variables in your CI secret store, not a .env file in the repository.
Record the App Store Connect app ID in your submit profile so the upload does not depend on someone picking the right app from a list at 2am.
{
  "build": {
    "production": {
      "ios": { "resourceClass": "m-medium" }
    }
  },
  "submit": {
    "production": {
      "ios": {
        "ascAppId": "REPLACE_WITH_YOUR_APP_STORE_CONNECT_APP_ID"
      }
    }
  }
}
Expected result: The build tooling authenticates to App Store Connect without an interactive prompt, and no secret value appears in the repository, the build log, or the chat transcript.
Verify it: Search the repository and the last build log for the key ID and the issuer ID. Both should be absent. Then revoke a test key in App Store Connect and confirm the upload fails, which proves the pipeline is really using the key you think it is.
STEP 05
Build the signed binary in the cloud
One command produces the .ipa. The signing certificates and provisioning profiles are handled for you.
A production build for iOS produces an .ipa. That is the artefact App Store Connect accepts. Anything you can install by dragging a file onto a device is not it.
The first build for a new bundle identifier takes longer, because certificates and provisioning profiles are created against your Apple team. Later builds reuse them until they expire.
Builds queue. Do not plan a launch on the assumption that a build starts the second you ask for one.
# Produce a signed production .ipa in the cloud. No Mac required.
eas build --platform ios --profile production

# Upload the finished build to App Store Connect.
# This puts it in TestFlight. It does NOT publish it to the App Store.
eas submit --platform ios --profile production
Expected result: The build finishes with a downloadable .ipa, and the upload command reports that App Store Connect accepted the binary.
Verify it: Open App Store Connect and confirm the build appears with the version and build number you set. Also check the mailbox of the Apple Account that holds the membership, because processing problems are reported there rather than in the build log you were watching.
STEP 06
Install the real binary on real devices through TestFlight
The build that a reviewer runs is not the build you saw in a preview. Test the actual artefact.
Expo documents that an uploaded build becomes available in TestFlight after processing, usually 10 to 15 minutes, and that a TestFlight build is not automatically released to the App Store. Checked 2026-08-16. Treat that gap as the whole point: it is your chance to find the crash before Apple does.
Install on at least one small screen and one large screen, and on a device that is not the one you developed against. A layout that only exists on your phone is the most common cheap rejection.
Run the paths a reviewer will run: first launch on a fresh install, sign up, sign in with the exact credentials you are about to hand Apple, the main task, sign out, and the permission prompts. Then turn the phone to airplane mode and check that failure states say something useful rather than spinning forever.
Guideline 2.2 says demos, betas and trial versions do not belong on the App Store and that TestFlight is the place for them. So do not try to ship a beta as version 1.0 with a note asking for patience.
Expected result: The installed build launches from cold, completes its main task on a phone you did not develop on, and produces a readable error rather than a hang when the network is gone.
Verify it: Have someone who did not build the app install it from TestFlight with no instructions and try to complete the main task. Watch without helping. Every place they stop is a place a reviewer stops.
STEP 07
Complete the App Store Connect listing and submit for review yourself
The listing is a separate submission surface with its own rejection reasons. Fill it as carefully as you built the app.
Complete the app name, subtitle, description, keywords, support URL, marketing URL if you have one, category, age rating, and screenshots. App Store Connect states you can upload one to 10 screenshots in .jpeg, .jpg and .png, with no alpha channels or transparencies, at the exact pixel sizes it lists per device. Read the screenshot specifications page for the current sizes rather than reusing last year measurements; the device list changes with every iPhone generation. Checked 2026-08-16.
Fill in the App Privacy answers honestly, including data collected by any analytics or third-party code you added. These answers become the privacy label on your listing.
Add the reviewer notes: the demo account, anything that needs a specific device or region, and an explanation of any feature that looks unusual. This field converts a rejection into a question more often than anything else on the page.
Select the build, then submit. App Store Connect help states that each platform can have one app version submission under review at a time, and that submissions may not be reviewed in the order you submit them. Checked 2026-08-16. Plan around days, not hours, and treat any review-duration figure you read anywhere as planning guidance rather than a commitment from Apple.
Expected result: The version status moves to a waiting-for-review state, and every required metadata field is complete rather than saved as a draft.
Verify it: Open the listing preview and read it as a stranger. Then confirm the privacy policy URL loads in a private browser window, and that the demo credentials you pasted actually sign in on a device that has never used the app.
STEP 08
Handle the review outcome and set up the next version
Approval is a state, not an ending. Rejection is a message with a guideline number in it.
A rejection names the guideline. Read the guideline text itself rather than a forum summary of it, fix the specific thing, and reply in App Store Connect explaining what changed. Arguing without a change almost never moves it.
If you genuinely disagree, Apple provides an appeal path in the same review area. Use it for a factual disagreement, not for a disagreement about the rule.
Once approved, decide whether the version releases automatically or when you press the button. Manual release lets you line up the launch with everything else you were going to do that day.
Increase the build number for every subsequent upload. Keep the reviewer credentials working: an expired demo account is the reason a second version gets rejected after the first one sailed through.
Expected result: The app is either live on the App Store, or you have a specific guideline number, a specific change, and a resubmitted build.
Verify it: Search the App Store on a device that has never had the app installed and open the listing. Check the seller name, the screenshots, the privacy label, and the support URL, then install and complete the main task from a clean state.
Four tests to run before you submit, not after
These are the four that map onto real App Review rejections rather than onto a general feeling that the app works.
| Test | Scenario | Expected result |
|---|---|---|
| happy path | A tester who has never seen the app installs the TestFlight build on a phone you did not develop on, creates an account, completes the main task, and signs out. | Every screen renders inside the safe area on that device, the account is created against your production backend, the main task saves something a second sign-in can see, and no step needs verbal instruction. |
| invalid input | The same tester submits the main form with an empty required field, an address with no at sign, a 200-character name, and an emoji-only entry. | Each case produces a specific message next to the field rather than a generic alert or a silent failure, nothing crashes, and no invalid record reaches the database. |
| retry | The tester taps the main action twice in quick succession on a slow connection, then backgrounds the app mid-request and reopens it. | One record is created, not two. The reopened app shows the completed state rather than an empty form, and a failed request offers a retry rather than a dead screen. |
| production smoke | You sign in with the exact demo credentials pasted into the App Review notes, on a device in a region and language you did not develop in, with the backend in its production configuration. | Sign-in succeeds first time, the privacy policy link inside the app opens the same live URL as the one in the metadata field, and the account deletion path required by guideline 5.1.1(v) is reachable from inside the app. |
What actually goes wrong, and how to tell which one it is
Six of these are rejections and two are build failures. Match the symptom before you change anything, because the fixes point in opposite directions.
| Symptom | Likely cause | Check | Fix |
|---|---|---|---|
| The build fails immediately with a bundle identifier or provisioning error | The identifier is registered to a different Apple team, is already taken on the App Store, or does not match the one in the App Store Connect record. | Compare the identifier in the app config, the identifier registered in your Apple developer account, and the identifier on the App Store Connect app record. All three must be identical, character for character. | Correct the config to match the registered identifier, or register the correct one under the right team. If it is genuinely taken by someone else, pick a new one now, before any upload exists to migrate. |
| The upload command rejects the Apple credentials | A revoked or expired API key, the wrong issuer ID, a key with a role that cannot upload builds, or a .p8 that was pasted with a missing newline. | Check the key status in App Store Connect under Users and Access. Then confirm the key ID, issuer ID and .p8 in your environment belong to the same key, and that the environment variable actually reached the process rather than sitting in an untracked file. | Issue a fresh key with the minimum role that can upload, store it as a secret, and re-run. Do not fall back to an Apple ID and password to make the error go away; you will hit two-factor prompts in automation instead. |
| The upload succeeded but the build never appears in TestFlight | Processing rejected the binary, the build is still processing, an outstanding compliance question is waiting for an answer in App Store Connect, or you are looking at the wrong app record. | Check the mailbox of the Apple Account that holds the membership for a processing notice, then check App Store Connect for an unanswered question on the build, then compare the build number shown there with the one your build actually produced. | Fix the reason in the email, increment the build number, and upload again. A build number cannot be reused even if the previous upload was never usable. |
| Rejected under guideline 4.2 for minimum functionality | The app is close enough to your website that a reviewer saw a repackaged site rather than an app. | Open your own submission and count the screens that do something the browser cannot: a device permission, offline data, a notification, a camera or location step, a saved session. If the count is zero, the rejection is correct. | Build one real on-device capability that serves the main job, ship it, and say so plainly in the reviewer notes. Adding four more screens of the same web content does not change the answer. |
| Rejected under guideline 4.2.6 for a template or app generation service | The submission came from a vendor account rather than from the owner of the app content, or the app is visibly one instance of a generic template. | Check which Apple Developer Program account the submission was made under. If it is not the account of the business whose content the app carries, that is the finding. | Move the app to the content owner Apple Developer Program account and submit from there, and make sure the app is genuinely customised rather than a template with a logo swapped in. No tool can submit around this rule on your behalf. |
| Rejected under guideline 2.1 because the reviewer could not use the app | Missing or expired demo credentials, a backend that was switched off or firewalled, a placeholder URL, or a crash on first launch. | Sign in with the exact credentials from the review notes on a device that has never opened the app, from a network outside your office. Then check your backend logs for the reviewer sign-in attempt around the review timestamp. | Provide working credentials that do not expire, leave the backend running through the whole review, replace every placeholder URL, and resubmit with a note saying what was fixed. |
| Rejected under guideline 5.1.1 over privacy policy or account deletion | The privacy policy is missing from inside the app, does not describe retention and deletion, or the app creates accounts but offers no way to delete one. | Open the app and try to reach the privacy policy without leaving the app. Then try to delete your own account from inside the app. If either takes an email to support, it fails the guideline. | Link the policy in both the metadata field and inside the app, extend the policy to cover retention, deletion and every third party that receives data, and build an in-app account deletion path. |
| The app works in the browser preview but fails on the phone | Code that calls a local address instead of the injected public API base, or a library with native code that the preview build does not carry. | Watch the backend log while you use the phone. No request arriving at all points at the address; a request arriving and failing points at the endpoint. An import that throws on the phone but not in the browser points at native code. | Route every call through the shared API client that reads the injected public API URL, and replace the native-code library with a JavaScript-only equivalent, or move to a build that can include native modules. |
Ship it, watch it, and be able to go back
Deploy
Treat a release as an identified artefact: a version string, a build number, the commit it came from, and the reviewer credentials that were valid at submission. Write those four things down for every submission, because you will need them when a rejection arrives days later.
Use manual release rather than automatic release for the first version. Approval can land at an inconvenient hour, and you want the listing to go live when someone is awake to watch the first installs.
Keep the backend the app talks to stable across the review window. A deploy that changes an API shape in the middle of review turns an approval into a rejection with no code change on your side.
Monitor
Watch crash reports and the first-session drop-off for the first week. A crash on first launch on one device model is invisible in aggregate install numbers and fatal to your ratings.
Watch the backend for the traffic pattern the app creates: sign-ups from a new client, error rates on the endpoints the app calls, and any endpoint the app hits that the website never did.
Read the reviews. Apple lets you reply, and a specific reply about a fixed bug is worth more than a generic thank-you.
Recover
You cannot roll back an App Store release the way you roll back a website. The recovery path is a new build with a higher build number, submitted for review, so keep the pipeline warm enough to ship a fix within a day.
For a serious defect you can remove the app from sale while you fix it. That protects new users but does nothing for the copies already installed, which is why the server side of a fix usually matters more than the client side.
Keep anything the app depends on changeable without an app release: server-driven configuration, feature switches, and content fetched from your backend. Every decision you hardcode in the binary becomes a review cycle later.
Secrets, reviewer data, and the privacy answers you sign
A store submission creates a short list of high-value credentials and one set of answers you are legally accountable for. Both deserve the same care as production access.
- Keep the App Store Connect API key, its issuer ID, and the Expo access token in a secret store that the build process reads at run time. Never commit them, never paste them into a chat window, and never put them in a URL.
- Use the smallest App Store Connect role that can upload builds. An upload robot does not need the permission to change bank details or remove team members.
- Create the reviewer demo account as a real but disposable account with no access to other customer data. Rotate its password after each review cycle and do not reuse a staff account for it.
- Ship nothing sensitive inside the app binary. Anything bundled into a mobile app can be extracted from the device, so API keys, admin endpoints and business rules belong on your server behind an authenticated call.
- Answer the App Privacy questions from what the code actually does, including data collected by analytics and any third-party library you added. The answers become a public label, and a wrong one is a policy problem rather than a bug.
- Give users a way to delete their account from inside the app, and make the deletion real on the server rather than a flag that hides the row. Guideline 5.1.1(v) requires the in-app path when the app supports account creation.
Questions people ask before their first App Store submission
How much does an Apple developer account cost?
Apple lists the Apple Developer Program at 99 USD per membership year on its enrolment page, read on 2026-08-16, with prices varying by region and shown in local currency during enrolment. Qualifying nonprofits, accredited educational institutions and government entities can request a fee waiver. Check the enrolment page for the current figure before you budget rather than trusting a number on any blog, including this one.
How long does App Store review take?
Apple does not commit to a review time, and App Store Connect help notes that submissions may not be reviewed in the order you submit them. Plan in days rather than hours, and add slack for a rejection and a resubmission. Any duration you see quoted, here or elsewhere, is planning guidance and not a service commitment.
Do I need a Mac to publish an iOS app?
Not if you use a hosted build service. Expo documents that EAS Submit works on macOS, Linux and Windows, so the binary is compiled and signed in the cloud and uploaded from whatever computer you have. Checked 2026-08-16. You still need your own Apple Developer Program membership, and you still press submit yourself in App Store Connect.
Can Playcode publish my app to the App Store for me?
No, and no honest tool can. Apple guideline 4.2.6 requires that apps built through a template or app generation service are submitted by the owner of the app content. Playcode can build the app, run the cloud build and the upload from your project, and draft the listing copy and screenshots. The Apple developer account is yours and the final submit is yours to click.
Why do App Store reviewers reject apps that are just a website?
Guideline 4.2 says an app should include features, content and UI that elevate it beyond a repackaged website, and 4.2.2 rules out apps that are primarily marketing materials, web clippings, content aggregators or a collection of links. The fix is to give the phone version one genuine device capability that the browser tab cannot offer, not to add more pages.
Do I need a privacy policy to publish an app?
Yes. Guideline 5.1.1(i) requires a privacy policy link in the App Store Connect metadata field and inside the app itself, and requires the policy to state what data is collected, how, every use of it, which third parties receive it, and how a user revokes consent or requests deletion. Checked 2026-08-16. A placeholder page will not pass.
What is TestFlight and do I have to use it?
TestFlight is Apple beta distribution. A build uploaded to App Store Connect lands there after processing and is not released to the App Store until you submit it and it is approved. Using it is not mandatory, but it is the only cheap way to run the exact binary a reviewer will run on real devices before that reviewer does.
Can I publish under my company name instead of my own?
Yes, by enrolling as an organization rather than as an individual. That path needs a legal entity that can contract with Apple, a D-U-N-S Number, a work email on the company domain, a website, and someone with authority to bind the company. Individual enrolment shows your personal legal name as the seller, so choose before you enrol rather than after.
What happens if my app is rejected?
You get a message naming the guideline. Read the guideline text itself, make the specific change, and reply in App Store Connect saying what you changed. Rejections are normal for a first submission and are not a permanent state. Apple also provides an appeal path for a factual disagreement, which is different from disagreeing with the rule.
Build it on Playcode
Build the app and the backend it needs in one project
Playcode builds a React Native app beside its own backend and database, so someone who signed up on your website can sign in on the phone. The agent runs the cloud build and the store upload from the project, and drafts the listing copy and screenshots. Your Apple developer account stays yours, and you click the final submit.
Start Building My AppNo credit card required. The Apple Developer Program membership is separate and paid to Apple.